Category: Home

Street Launched: Chrome and Zen Meets Pink

Street Launched: Chrome and Zen Meets Pink

What happens when street artwork inspires a dining area? I’ve been asking myself that question since I snapped this Brooklyn scene.

It instantly caught my eye. I had been walking a street at the Williamsburg area, conversing with a friend, and there was. It is as if the term had been painted as a reminder, but in pink and using a motorcycle in front of it, it seemed like a juxtaposition of styles. Yet somehow it worked. Weeks afterwards, I found myself considering the picture, wondering what a room with inspiration drawn from it’d seem like. This is my answer.

Restoration Hardware

Flatiron Dining Table – $795

A reclaimed wood dining table with metal legs is perfect for gathering guests. It takes its cue from the wood panels”Buddhas” was written on in the first photo.

Pottery Barn

Tolix Café Chair – $199

Simple silver industrial chairs highlight the motorcycle effect on this area.

Charcoal Grey Cast Stone Garden Buddha Statue – $42

This stone Buddha statue might be the most obvious addition to this space, but I love the way it integrates some of the colours and the concept in the image. Additionally, it adds that touch of Zen that a fantastic dining area needs.

Layla Grayce

Romantic Lace Wool Rug – $253

Usually, you might believe pink carpets are earmarked for women’ rooms, but this one functions equally well in a contemporary zen meets bicycle room. This yin is a superb balance to another yang bits in the dining area.

One Kings Lane

Madera – Altar Sideboard

This sideboard functions nicely as both an altar for the statue and somewhere to store additional dishes, antiques and silver. It captures the color of the sidewalk cement flawlessly.

Z Gallerie

Publications – Silver Set of 8 – $159.60

Novels alone add a touch of class to any area, but these in particular would be great as a book end to hold a selection of Asian art publications — or cookbooks.

Restoration Hardware

Harmon Pendant | Restoration Hardware – $349

The chrome is brought in again overhead at a ceiling lighting. Two would shed just the right quantity of light onto the scene.

My Sparrow

Edison Table lamp | My Sparrow – $96

All these Edison light bulbs add a touch of whimsy into the room and provide a little bit of additional lighting onto the sideboard.

The Loaded Trunk

Graphite Contemporary Stoneware – $190

Black rock dishes play in the Zen vibe perfectly — and let the meals being served shine.

Maintain Calm and Carry On – $16

Pink matches Zen inside this traditional pop culture print. I love this for a wall socket. It is a great way to find another touch of pink into the space.

Artdecotek & a.d.t Pro

This Buddha wall bit will balance the Maintain Calm poster and remind guests where the inspiration all began.

More: Flowers Inspire Interior Color Palette
Zen Gardens: Serene Outdoor Spaces

See related

Houzz Tour: Fuss-Free Venice Beach Bungalow

Houzz Tour: Fuss-Free Venice Beach Bungalow

Situated in Venice Beach, Calif. — a bustling seaside tourist destination for its art and culture — is a cozy bungalow built in 1895 which belongs to interior designer Katerina Tana. Los Angeles-born and London-raised, Tana purchased the property from 2000. The house was originally recorded as a tear-down, but she chose the project to add her own stamp of style. “The decision to embark on a complete rebuild was in part to love what I put my clients through,” she says.

Growing upward, Tana spent summers in Croatia on the Adriatic Coast, along with also the”magical Mediterranean atmosphere” and her roots in theater and film are observed throughout the house. Tana eliminated walls and additional skylights. She included classic bits and interlocking every corner of this two-bedroom, two-bath house. A studio and garage space preserves the authenticity of the house’s 19th-century origins.

As well as her interior and landscape design work, Tana also comes with her own line, Katerina Tana Collection featuring first fabric, wallpaper, rugs, lighting, and table layouts. She approaches her endeavors with the objective to”create a style for the client’s house and for their life,” much as this space reflects her own life with its own thoughtful, artistic details.

Katerina Tana Design

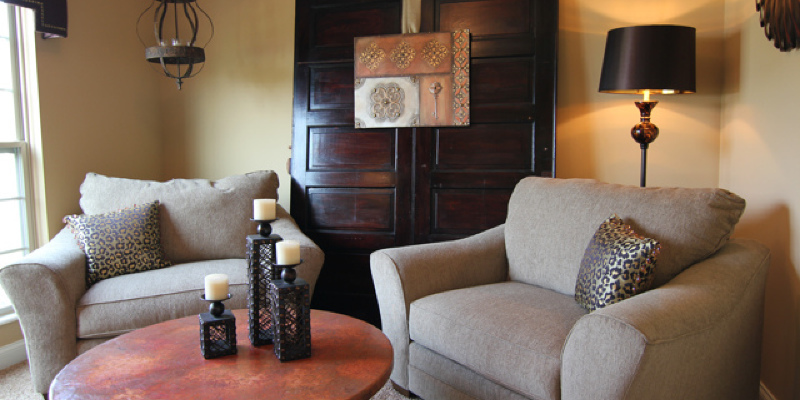
A friend described her location as”the house in eight colors of white.” That aesthetic is captured here in the living area. Built-in bookshelves separate the major seating space from the kitchen; they have been deliberately built just shy of the ceiling to allow natural light to flow in by a kitchen skylight. The major inspiration for the house was”distilling the house so there was nothing which would result in clutter or fuss.”

A custom armchair provides comfy chairs by a coffee table. The glass art piece, inspired by fireflies and branded”Bell Jar,” is by Los Angeles-based Alison Berger. Tana can be a lover of Berger’s lighting layouts, carried at Holly Hunt.

Yellow cashmere throw: Denis Colomb
Glass Bell Jar: Alison Berger

Katerina Tana Design

“I despise fuss,” Tana says. “I really like elegance and comfort combined.” With that framework, she designed a space that is inviting inside and outside, starting with the porch. A seating area gives you furniture made of banana leaves from Indonesia and lavish turquoise cushions. A porch came with the first residence, but Tana had it reconstructed, adding more structural support, Pennsylvania Bluestone tiles and pendant lighting. Two birch branches lean casually against the sides of the doorway. Gathered in the aunt’s farm at Three Rivers, near the Sequoia National Park, they create a pure framework as you step inside the clapboard-sided bungalow.

Industrial Pendant Lighting: Urban Archaeology
Tile: Pennsyvania Bluestone

Katerina Tana Design

A tall white timber fencing and vibrant purple wisteria make for a dramatic pairing ahead. “Wisteria was an easy choice because it would get as much light as it needed and it looks fantastic and gnarled when bare.” Tana enjoys plants which denote the delicate Southern California seasonal adjustments, and as soon as it is in blossom she says,”You can hear people oohing and aahing out because they stop and sniff it!”

Katerina Tana Design

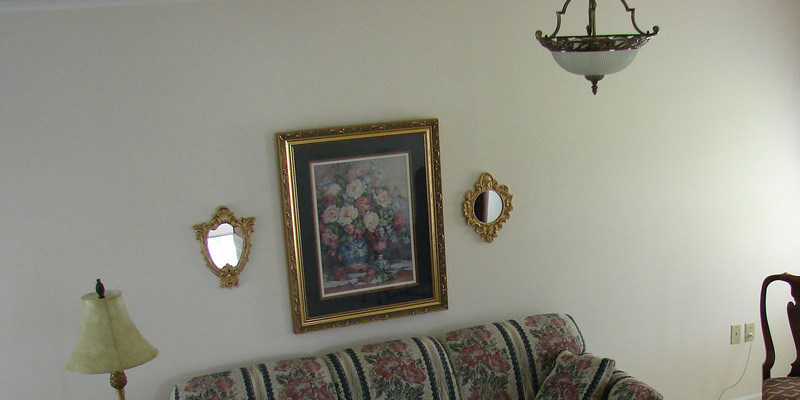
For Tana, every detail counts. In the living area, a collection of bowls shirts a 19th-century Japanese rosewood shelf beside an antique African stool. The set of framed portraits from Burma are by 19th- and 20th-century photographer Felice Beato. Tana began collecting his work about 12 years back.

Katerina Tana Design

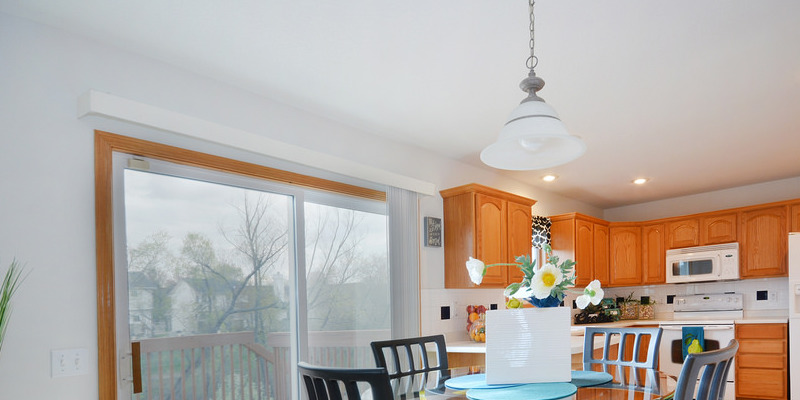
Tana’s no-fuss design philosophy is manifested from the kitchen’s tranquil color palette. Blue ceramic tiles constitute the backsplash, and polished nickel hardware, along with a Shaw handmade fireclay farmhouse-style sink, adds to the effortlessly casual appearance.

Countertop: Pennsylvania Bluestone
Faucets: Rohl, Perrin and Rowe
Sink: Rohl, Shaws Original

Katerina Tana Design

A handmade braided tray from New York artist Jonathan Kline functions as headboard in the master bedroom. The woven pieces are created out of ash trees Kline develops himself. Tana says she’s also collaborating with the artist interior shutters, as she’s attracted to”the way the light comes through them.”

Flanking the bed are a set of oversize Turkish tiles at a glowing blue complementary to the pink bedding by a London linen store.

Woven Tray: Jonathan Kline
Bedside tables: Waterworks
Bedding: Cologne & Cotton
Lighting: Urban Archaeology

Katerina Tana Design

At a nod to the nearby canals and beach a five-minute bicycle ride off, the bathroom includes a clean white and blue color palette. The brilliant blue oversize tiles are all creations of ceramic artist Adnan Hoca of Turkey, who works with the Iznik Foundation.

Tana has collaborated before using the Iznik Foundation for her set on a project Named Centuries Ahead. Tana designed tables around unique tile centerpieces; each table was handcrafted by woodworkers and bronze casters in California.

Countertop: Honed Volakas marble
Mirrors: Waterworks
Tiles: Iznik Foundation
Lighting: Urban Archaeology

Katerina Tana Design

The second bedroom includes additional classic furniture and collected pieces. Tana gets her furniture from dealers from the LA area (such as Eccola) and Santa Barbara, London and Paris. Above the bed is another first woven timber tray by Kline. This room provides the ideal cozy refuge to unwind from the welcomed stresses of living so near the Pacific shore.

Woven Tray: Jonathan Kline

Katerina Tana Design

Fragrant and edible plants greet you when you head out to the inviting backyard. Artichokes left to blossom add exquisite sculptural and textured form. Other plantings include lavender, pelargonium, and scented rose geraniums. Four Michelia Figo trees grow slowly, but”are particularly happy in the space and have an insane banana odor whenever they blossom,” Tana says. Water always flows in a carved white marble fountain from India, providing a pleasant place for birds to splash around and clean their wings.

Katerina Tana Design

The garden is one of Tana’s treasured areas, and it’s easy to see why. A Sombreuil (climbing rose) and tall cypress trees add to the bucolic setting. The size of this garden can be enviable, as Venice is a densely developed area where it is becoming increasingly rare to discover open outdoor spaces.

Katerina Tana Design

Fruit trees — lemon, orange, mandarin and Santa Rosa plum — provide delicious harvests. The spacious yard lends itself to dining al fresco; Tana enjoys fun as many as 100 individuals here. “It never seems to feel bloated. In Venice, space is the greatest luxury,” she says.

“I don’t believe luxury needs to be for a special event,” she continues. “Good design is something we ought to encounter at every turn.” It’s certainly encountered throughout this cheerfully elegant California house.

More Houzz Tours:
Kerrie Kelly’s California Style
Nation Glamour at Woodstock, NY
Comfort and Elegance for 5

See related

The best way to Attach a Cupboard Door to an Island Front

The best way to Attach a Cupboard Door to an Island Front

For those who have an island that extends from other foundation cupboards to the space on one aspect, or a free-standing island cupboard in your house, you need to have access. It is simple enough to reduce one and connect a door in case your island cupboard does not have have an entry from both sides. Should it not interfere with the drawers, it’s possible for you to cut a door-opening everywhere around the front-side of the island. This can be a typical aftermarket up date to island cupboards.

Hold the door in position on the very front of the island as though it were previously connected.

Trace across the door and take it off. Draw another do-or 3/4 inch smaller than the tracing. This may function as the size of the door-opening. Set a round saw blade to reduce 3/4 inch-deep. Use the saw to cut the opening out. Because the door will overlap the opening it will not have to be ideal

Cut a 30-degree bevel on one side of the do-or when it is not currently a 30-degree door. A tablesaw blade to 30 levels. Slide the fence up to to within 1/32 inch of touching the blade. Place the do-or face up against the fence and drive it.

Sand the 30-degree edge of the door-opening as well as the door easy with 100 and the hand-block -grit sand-paper.

Wipe the fringe of of the do or opening and also the fringe of of the do-or having a stain that matches the cupboards. Allow the stain to dry completely.

Place the do-or encounter-down. Measure 2″ from every corner on the beveled facet and create a mark. Place the hinge on the do-or, together with the best on the mark of it. The round cylinder component will suit up beneath the lip, as well as the plate will prolong onto the portion of the do-or. Place 5/8inch screws and screw the hinges to the do-or using a screw gun.

Center the do or within the door opening. The door should prolong after dark perimeter of the opening 3/4 inch on all sides. The plates should be resting on the facial skin of the island. Insert screws and use the gun to screw the do-or to the island entrance.

See related

The best way to Replace a Round Saw Cord

The best way to Replace a Round Saw Cord

Do-it-yourself perform on property can really save lots of money plus time. Being capable to fix small things such as cupboard drawers, corner molding or wood crown as well as an outside wood shed on the house, will make the home more attractive to the potential purchaser. Before the cord is changed, but in case you inadvertently cut the cord all repairs must-stop.

Very cautiously unplug the cord from your outlet. If the aged cord was damaged cut power to the outlet.

Where the cord enters, remove the handle. Screws will hold on it; all of these require to be eliminated. Different manufacturers will use various kinds of screws to fasten the handle. They might use a phillips-head, a hex-head, or, on a head, older versions. Pull the handle aside when the screws are out.

Remove as it comes to the handle, the cord bar that holds the cord. This may be a little piece of steel which is held in with two screws.

Remove the ground wire, which is attached to the chassis of the round saw. All contemporary round saws will use a three-prong plug having a white wire, a black hotwire as well as a ground wire.

Unscrew the cord wires in the trigger. Round saws that are older type had the wires connected right to the trigger sides. Newer versions will come equipped with digital triggers. By removing two screws, the trigger needs to be disassembled. The wires will be inside of the trigger. Unscrew the posts that support the the wires in place after the trigger is disassembled. They may possibly require a tiny hex push bit slotted bit or a Phillips bit.

Pull the aged cord from the strain-relief sheath.

Use a specific suppliers substitute cord for an upgraded. Should they carry that make of of noticed many components shops will have them. If maybe not, you are able to order one. Cords are available on the Web or in a servicecenter that repairs your make of of circular observed.

Push the cord that was new straight back through the strain-relief sheath and re wire it the way it arrived on the scene. On manufacturers with digital triggers, a brand new trigger may be included by the producer using the cord. For the reason that case, change the trigger assembly that is outdated using the new one, and wire it appropriately.

Press the trigger that is re-wired into location. Attach the floor wire. Place the end-of the strain-relief sheath and tighten. Line insert the screws up the manage screw-holes and tighten.

See related

The best way to Get Wallpaper Off with No Steamer

The best way to Get Wallpaper Off with No Steamer

Real estate professionals recommend that homeowners eliminate wall paper that is printed and change it with a paint colour before putting a home out there. There’s over one way to eliminate wall paper, therefore if you’d choose to avoid operating using a warm steamer, decide which non-heat technique works best. Some wallpapers will be eliminated by merely pulling in the wall and are made to be stripped. Non- wallpaper demands the use of a chemical solvent to loosen its bond together with the wall and is resistant to elimination. Be certain to place a big tarp beneath work location before you start. Have a big waste can ready, because as you go along, discarding the wall-paper produces an easier cleanup.

Dry Strip Technique

Test the wall-paper to find out without being wet down whether it comes unusual. Insert a putty knife under a wallpaper seam close to the ceiling to loosen a a large part. Using your hands hands, gradually pull the wall-paper toward you at a 10- to 15-degree angle. Don’t pull wall paper perpendicular to the wall, since this may damage the area.

Continue to strip the wall paper away if it comes off the beaten track with relative simplicity. Work your way all the way through, section by section.

In the event the wall-paper shreds and tears as you attempt to take it off discontinue the strip technique. Switch to the gel approach that is solvent.

Gel Solvent Method

Roughen the the top of wall-paper using a scoring instrument, relocating it in a criss-cross routine. This tool makes small tears in the paper, permitting chemicals and dampness to soften the paste. Avoid pressing on the instrument, otherwise you could damage the wall.

A business wall paper remover gel on one area of of wall paper. The guidelines regarding the gel needs to be permitted to soak — possibly about 2-0 to 3-0 minutes.

Insert a a skinny putty knife under a wallpaper seam close to the ceiling. Push the knife beneath the wet wall-paper with one-hand and eliminate the wall paper that is loosened with all the other-hand. It is possible to spray the part with gel to commence it soaking as you eliminate the wall-paper in one area.

A wall-paper part let it soak if it remains challenging to pry from your wall and with removing gel a 2nd as well as a third-time.

As you remove wall-paper do not jab or gouge with the putty knife. The elimination gel might have created the wall notably delicate and hence mo-Re susceptible to damage.

Remove Wallpaper Adhesive

Run warm water right into a bucket and include a little amount of tri-sodium phosphate, detergent, or TSP.

Dip a sponge to the the perfect solution is and scrub a-way any wall-paper adhesive remaining. Use a putty knife to loosen any places that are tough.

Rinse the wall completely utilizing a clear sponge plus simple water.

See related

The best way to Attach Dry Wall to Plaster Walls

The best way to Attach Dry Wall to Plaster Walls

In the event the plaster walls in your house are very costly expensive to fix or un-attractive, it is possible to cover them with dry wall and begin clean. Drywall wants a substrate that is strong, therefore fasten free plaster again to the wood lath strips with plaster screws behind it. Plaster screws have a washer-type fitting that AIDS in preventing the plaster. Scrape any plaster and fill the hollow that is ensuing having a patch of dry wall. The partitions are generally sound enough for dry wall once aged plaster is stabilized.

Pry off the window, baseboards and door trim and crown molding in the area together with the end of a prybar. Number the back of every bit of trim to assist you re install the parts properly.

Remove faceplates covering light switches and retailers using a flathead screw-driver.

Locate the wall studs on the other side of the plaster using a studfinder. The majority are are battery-powered, although finder procedure is different somewhat by producer. As a studfinder is handed across a wall, lights or sounds signal the elevated wall density that signifies a stud in the finder. Following the manufacturer’s working directions, locate the studs through the room and mark the areas in the bottom edge of the wall as near the ground as possible. If eliminating the baseboards uncovered portion of the wall studs in the floor-level, you don’t require to mark the studs on the wall.

Place a row of 1 inch- boards on the ground across the bottom of one wall. Transfer the places in the wall along to the boards on the ground, marking the tops of the boards using a pencil. These boards are spacers that that creates an expansion gap between the edge of the floor as well as the dry wall.

Set the sheet of dry wall from the wall and rest the edge together with the row of spacer boards.

Insert 2inch drywall screws throughout the drywall and to the wall studs on the other side of the plaster using a power drill along with a Phillip’s-head screwdriver bit. Use the marks on the spacer boards as an area guide that is stud. Space screws roughly 6″ aside along every stud, but don’t insert screws closer than 3/4 inch from the edges of the dry wall.

Hang the the remaining of the dry wall on the wall, leaving a 1/8 inch space between sheets, before you reach the conclusion of the wall. Measure and mark the place of the obstacle as you approach an obstacle for example an outlet or mild change and minimize out the opening having a utility knife.

Subsequent to the wall is full pull out the spacer boards, and shift the boards to the following wall.

Scratch the aged stud place marks on the boards out, make new marks that are stud as required continue hanging drywall across the space in much the same.

See related

Painting Lamimate Cabinets

Painting Lamimate Cabinets

Painting can change boring although useful 1970s-type laminate cupboards in to a clean aspect interesting and of a contemporary layout. that is kitchen Simple and economical, painting laminate cabinets needs several days of drying and work time, attention to detail and complete planning to make sure your completed results appear better than brand new.

Preparation

Laminate cupboards carefully to ensure results. Remove the doors in the cabinet frames. Remove the components from the cupboards as well as the doors, in the event you had want to paint over it, or abandon the components in place. Wash the cupboards as well as the doorways with warm, soapy water along with a sponge. Dry them completely using a rag. Clean the components with steel polish as well as a rag in the event that you plan to re-use it. Sand the cupboards with 120- to 150-grit sandpaper to provide a suitable area to to stick to to to the primer. Remove dirt using a rag that is tacky and clear the work-space properly to make sure that no dirt eventually ends up up in your paint-job.

Replacing Components

Now is a great chance to change unsightly or damaged hinges, handles and drawer pulls. Consider alternatives that add a style component to your own renovation. Bright fake crystal handles include chic that is kitschy into a 1950s inspired space; smooth steel pulls complement a contemporary aesthetic. Spackle and sand the holes so you can paint over them, should you switch components. Install the components only following the last coat of paint is totally dry.

Priming

An adhesion-promoting latex primer for the coat. These primers are particularly suited to non-porous surfaces to bonding. Cover the the top of cupboards completely and evenly using a roller or brush, or use a spray model. Allow the primer to dry for three or two times, then sand it with a 220-grit sand-paper to help facilitate bonding with all the paint.

Painting

Choose oil or latex paints having a high or medium gloss sheen for cupboards which will be simple reflect and to clear lots of of sunshine. Colours that are light sense bright and open, a unique selection in many kitchens; dark colours make a space sense mo Re personal, which may be appealing in big, open-floor ideas. Dark shades may possibly need several coats to to look even. Let each coat dry for a-T least 24 hrs between apps. Be cautious of paints with egg Shell or matte sheen, as these are mo Re vulnerable to water water damage and mold. If you don’t want a particularly reflective finish no varnish is required.

See related

The best way to Trim a Conventional Boxwood Hedge

The best way to Trim a Conventional Boxwood Hedge

Boxwoods (Buxus microphylla) are significant crops that will create a hedge between yards or parts of of the backyard. Hedges are usually employed as a style component that offers privacy and divides area in gardens. Hedges are suitable for develop in Sunset’s Environment Zones 4 through 2-4. Once planted, seasonal trimming to keep its form and dimensions will be required by the hedge.

Measure the width at every end of the very top of the hedgerow by means of your tape measure. Determine width of the hedge and the required height and use these measurements to create a string outline for use as a guide through the cutting procedure.

Drive a stake to the soil at every end of your boxwood along with your little sledge-hammer to mark the preferred width and height of the hedge. Such it is discernible in the plant the very top of the stake should project over the hedge. Tie a string between both stakes as established in Stage 1, and increase or reduce the string to coordinate with your measurements. Place a 2nd set of stakes until all aspect are encased in a string frame-work, and string on the trunk side of the hedgerow.

Cut the sides of the hedge in to form utilizing a power hedge trimmer. Swing the clipper from below so that its blades aren’t blocked by foliage and it’s also able to cut little branches and leaves away easier. You’ll often chop to the branches as opposed to skimming the surface easily in the event that you come in the top down. Use your strings as a visible manual to keep the sides of the plant.

Cut the very top of the boxwood by reducing to the plant in the required height and commencing a-T one finish. Your strings will serve as the information that is visible. Cut gradually using a sweeping routine that is easy in place of forcing through the trimmer. When you utilize also much stress or pace, branches can be torn by the clipper blades and do mo-Re injury than excellent. Use a freestanding ladder to gain access to the tops of hedges which are out of achieve.

See related

The best way to Hang a Shelf on Dry Wall Studs

The best way to Hang a Shelf on Dry Wall Studs

Space for storage is extended by shelving and makes superb use of your space — particularly crucial in a tiny house. The shelf that is best also provides a touch that combines storage with interior decor. Hanging the shelves guarantees they stay secure and strong without harming the dry wall in it. Stud hanging removes the need for specific dry wall anchors and time consuming installation. Wall studs are situated select or 16 inches apart on center, therefore calculate the studs to help you select a shelf that spans the necessary length before you purchase.

Before you hear a good thump that signifies the current of a stud, knock on the wall along with your knuckles. Alternatively, move an electronic stud finder within the wall till it signifies the existence of a stud, usually by lighting beeping or up, with respect to the model.

Mark the area using a strip of masking tape. Locate the stud that is 2nd and mark its place.

Create a little pencil mark to the stud in the required height for the shelf.

Hold a laser level on leading the pencil or a spirit-level mark. Make another mark on the next stud on the level line.

Place a bit of tape on the pencil mark. Drill a pilot hole, using a bit somewhat smaller compared to wood screws, through the pencil and tape mark on every stud. The dry wall is prevented by the tape from cracking.

Remove the tape. Position the shelf therefore its mounting bracket holes line up with the holes that are drilled. Screw the wood screws to studs and the wall using the screw-driver that is proper.

See related

The best way to Install Window Box Planters

The best way to Install Window Box Planters

One way to improve the curb appeal of your house will be to add inviting touches. These easy boxes spilling over with colourful blooms give a home a comfy look that just says “Residence.” Install two on the entrance of your home or a window-box planter underneath a notable window. It is possible to finish this in several minutes in the event that you are pretty useful. You will give your house while adding a dimension to your own landscaping scheme, a stylish look.

Measure an area 1-inch below the windowsill in the event that you’ve got double- slider windows or hung. Draw a line in one side of the window to another now. Use a level to ensure the line is even and level with all the ground. Attract this line 8″ below the window-sill for those who have windows that open outward.

Hold a wood bracket from the siding below the proper edge of the window. Place the very top of the bracket on the line you drew. Mark an area on the bracket correct over the base of the bit of siding below the window.

Drill a hole through the bracket in the level you marked and through underneath and the siding. Shoot some caulk to the hole to help keep moisture from the wall. Attach the bracket to the wall using a 3 inch galvanized decking screw.

Drill a hole through the underside of the bracket and to the home underneath. Attach this conclusion to the home with with another 3inch screw.

Attach the bracket that is other below the fringe of of the window in much the same. Check your installation together with the le Vel often to make positive the very top of the planter box will soon be level.

Hang the window box on the brackets. Drill a hole and insert still another screw a T these factors to secure the box.

See related