Category: Garden

The best way to Pinch Off Dead Flowers From Orchids

The best way to Pinch Off Dead Flowers From Orchids

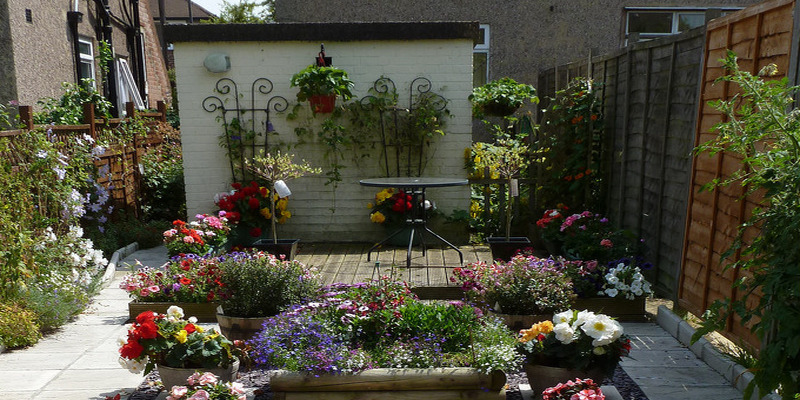
Bringing house that superbly blooming orchid from even grocery store display or the nursery might be an intimidating prospect. These unique beauties, with their long lasting blooms are really easy to care for as house plants when you follow several simple treatment guidelines: keep them in bright, indirect light; water-only when required and permit water to drain in the plant; keep them warm; and fertilize lightly. After the grower that is original -made blooms begin to fade, eliminate flowers that are dead prepared to get a year of progress and to keep the plant looking its finest.

Check the flower spike for indications that the blossom is on its last legs. It generally becomes brown-ish and discolored around droops and the edges. Orchids generally marketed as house plants have several blooms like spike – on a a skinny stem. Blooms generally open in the bud that is bottom up, hence the first faded flowers should be-at the entry level of the spike.

Pinch the quick, delicate stem of the bloom between fore-finger and your thumbnail where the stem emerges in the flower spike.

Drop the flower in compost or the trash, a way in the plant, to avoid illness impacting some nearby or that plant.

Repeat as each flower fades over the flower spike of the orchid.

See related

The best way to Care for a Candle Bush Plant

The best way to Care for a Candle Bush Plant

The Candle Bush plant known as Senna alata or the Candlestick plant, is a tropical able of achieving a dozen feet high. The plants feature flowers and development resembling candles that bloom from summer to fall. The Candle Bush plant is drought-tolerant and climate-challenging, making it an ideal plant for professional and in-experienced gardeners alike. With origins in the tropical Americas, Africa, and South-East Asia, the Candle Bush is a yearly in U.S. Department of Agriculture Hardiness Zones 7 to 9, but grows as a perennial in Zones 10 and greater.

Select a full-sun area for the Candle Bush plant where the soil is -draining. Shade is perhaps not perfect, although tolerable. Start seeds indoors six to eight months prior to the last frost for transplant and yearly progress when the plant reaches ten to twelve inches tall. Alternatively, buy seedlings from a nursery that is local.

Water the plant weekly when rainfall isn’t adequate, to to provide at least a half-inch of water and keep the soil moist. The Candle Bush plant will become more drought-resistant as it becomes proven if developed as a perennial.

Weed the region all around your Candle Bush plant frequently to to diminish water opposition. Apply one to two inches of mulch to the location, if preferred, keep water and to cut back on weeds.

Feed your plant using a half-strength solution of a well-balanced fertilizer, like 101010, to inspire it to attain its full-height and create lush blooms that are. Remember to feed centered on the existing height of the plant, maybe not the predicted peak as you use fertilizer.

Propagate by gathering seeds in the plant once the pods have turned brown and dried. Let some seeds drop to the floor for yearly expanding in the event that you want the plant to to try to self-sow.

Allow Candle Bush crops grown to dieback soon after the first frost and remove dead progress. Prune crops after seed or blooming selection, trimming again each branch to its size. Make each cut right after following branch or a bud at a 45-degree angle.

See related

Gerbera Cultivation

Gerbera Cultivation

Gerberas (Gerbera jamesonii) can shock you by creating huge, daisy-like blossoms in shades of yellow, orange, red and cream any moment of year, even in cold temperatures. The 4- to 5 inch flowers sit atop thick stems that rise over the dense clumps of foliage by just as much as six inches. Although they’re tender perennials that tolerate temperatures they’re treated as annuals in places that encounter mild frost for the reason that it sets again progress and flowering and leaves the foliage.

Requirements

Grow Gerberas as perennials in U.S. Department of Agriculture plant-hardiness zones 9 through 11 or Sunset zones H1, H2, 8, 9 and 12 through 24. Plant them in free soil that drains. About the West-Coast, they require full sunlight. Further in land, offer afternoon shade.

Planting

Plant dwarfs eight to 10″ apart and gerberas spacing common sorts two-feet aside. Water the plant thoroughly so the crown is an inch over the soil, and plant it. In the event the soil doesn’t drain rapidly, produce a mound of soil and plant the gerbera in the mound to keep the crown dry. Water the soil throughout the plant and use a 2 inch layer of mulch like fir bark, using care not to distribute mulch near the crown. Keep the soil moist until the plants start to to put up new development.

Care

Prevent obtaining the crown when watering gerberas and foliage moist whenever you can. Water gradually to enable the moisture permit the soil round the crown dry between waterings, and to sink into the soil. While the plant is in bloom feed gerberas with liquid plant foods. Cautious watering and spacing stops mildew. In the event that you discover white, powdery-seeking splotches on the foliage, select off the leaves that are affected.

Propagation

By dividing the crops every two years approximately propagate gerberas. Lift the whole plant and use a knife to cut via roots and the crown, dividing it into three or two clumps. Gerberas are susceptible to root and crown rot, while you have the plant from the ground, therefore analyze the roots. Clip off items of of root that are darkish in-color or appear slimy. Replant the clumps as quickly as possible.

See related

The best way to Grow Dwarf Mulberries

The best way to Grow Dwarf Mulberries

Hardy in U.S. Department of Agriculture zones 5 and greater, dwarf mulberries are smaller variations of conventional mulberry trees and produce berries that are about about 50% the dimensions of conventional mulberries. They take up room in your lawn as they’re smaller than conventional mulberry trees. Choose a Geraldi dwarf for darker fresh fruit or a dwarf mulberry for scarlet berries. Together with the appropriate circumstances, dwarf mulberries can prosper in a sunny place in your backyard and supply you with delicious and juicy fresh fruit every year.

Clear the area all around your tree because dwarf mulberries require lots of room for the roots to spread as it grows. Dwarf mulberry trees reach heights of no more than 12-feet, but might spread several feet in either course. Do not plant trees or foliage that will shade your dwarf because it wants six to eight hours of sunlight each day-to prosper.

Apply a 2- to 3 inch layer of mulch round the bottom of the dwarf mulberry tree to the region. This can help the soil retain moisture. Mulch can help manage weeds, which may rob your dwarf mulberry of water and important nutrients. Replenish required to sustain a 2- to 3 inch layer.

Water your dwarf mulberry tree frequently. Plenty of water is especially crucial during dry spells before it’s ripe, because if the roots aren’t getting enough water, the fresh fruit will drop off the bush.

A 10-10-10 in spring before the dwarf mulberry tree starts to winter or early in the bear fruit. Water the fertilizer to the soil so the nutrients reach down to the roots.

Cut again the tree by one third after the period, which will be usually in winter. Remove wood that is over-crowded at the same time. Cut one main branch out to encourage the tree to generate mo-Re good fresh fruit.

See related

How to Air-Graft a Lychee Tree

How to Air-Graft a Lychee Tree

Nothing says “tropical get-away” really like unique fresh fruit. Gardeners in the sub-tropical areas of the United States have several options in regards to expanding odd fruits in their own orchards, with lychee being a favored. Lychee is propagated but does not take easily to grafting although like other fruit-trees. A connected method called air-layering, also called air grafting, is utilized to create clones that were viable. A gardener can induce the hurt area to create a totally new plant which can be removed from your parent and planted by harming the tree.

Select a shoot on the parent lychee tree which is between one half and three quarter inches in diameter. Make two cuts on the shoot, just through one, the bark -and-one half inches apart. Slice through the bark, just involving both cuts, in order to peel off the bark involving the cuts that are parallel. Peel the bark layer off the shoot between the cuts that are parallel to expose the layer that is white inside.

Till it’s moist, but not dripping moisten about three glasses of of sphagnum moss. Set it aside to drain. Apply rooting hormone using a brush to the part of the shoot. Wrap the drained sphagnum moss across the barkless part of the shoot, making certain to overlap the bark by at least one half inch on every side of the wound. Some light duty string across the sphagnum moss to keep it.

Wrap the sphagnum moss with heavy duty clear plastic wrap. Secure each end tightly to it self with tape. Overlap the bark with tape so the wrap is secured to the shoot plus the itself. Watch for new roots moss in eight to 10 months.

Remove the air- part in the tree, cutting just just beneath the tape on the underside of the root ball. Unwrap the plastic wrap and string, leaving roots and the moss undisturbed.

Plant the tree that was new right into a nursery mattress prepared for lychee trees that were youthful. Place a tent manufactured from clear plastic over the youthful tree to motivate advancement of the root method. Provide the plant having a shade before the plant is promoting roots that are adequate to avoid blow drying in sunlight.

See related

The best way to Grow Clethra

The best way to Grow Clethra

Clethra, also called clethra, is a shrub indigenous to the whole United States. The shrub creates reddish-pink, sweet scented blooms in late summer. The fragrance is a cross between sweet and spice. Clethra can attain width of 10 feet and a height of 8 feet. This decorative shrub does best in USDA zones 4 to 9. Although clethra can be simple to develop, they do need some treatment to promote wellness and optimum development.

Purchase clethra in springtime from garden-supply or an online retailer shop. Select a shrub that’s indications and foliage of leaves. Roots growing from the container are a signal of a clethra shrub that is healthful.

Select a developing website that’s enough space to develop and full sunlight to partial shade. Clethra grows best in well- drained soil. Be certain to room each plant about 4-feet apart, in case you plant over one shrub. Plant the shrubs by windows so when the plant blooms its aromatic flowers, it is possible to open the windows to enjoy the fragrance.

Use a tiller to break up the soil up to 8″ deep. Dig the hole as big as the root ball. Be certain the soil below the root ball is free to make sure the roots that are new will penetrate to the floor.

Place the shrub in the hole. Mix equal portions of compost and the current soil. Pack the mixture down firmly to eliminate any air pockets. The very top of the root ball of the shrub needs to be level with the floor.

Add fertilizer in accordance with the package directions across the bottom of the shrub.

Water the plant and root ball properly, however don’t saturate it. Keep the soil moist and prevent over-watering. Apply a layer of mulch within the s Oil deter weed development and to wthhold the the dampness. The shrubs can tolerate durations of drought once proven.

See related

The best way to Plant Nasturtiums in a Hanging Basket

The best way to Plant Nasturtiums in a Hanging Basket

Gardeners searching to get a fast, affordable solution to brighten the look of the patio or entry way of a home’s can not go wrong with a hanging basket stuffed with trailing nasturtiums. The traditional bloomers thrive with minimum treatment in vivid sunlight and poor soil. Annual crops that bloom for one season, water is required by nasturtiums, choose no fertilizer and so are rarely bothered by bugs. Nasturtiums bloom in six to eight months once planted.

Plant nasturtiums as quickly as danger of frost passes in springtime.

Select a number of semi-trailing nasturtiums to get a hanging basket. Semi-trailing nasturtiums grow to lengths of 2 to 3-feet. Other kinds of nasturtiums contain dwarf nasturtiums, which show climbing sorts with runners that develop as long as 8 feet, and bushy, compact development.

Fill a hanging container with general-purpose planting medium that is business. Avoid potting mixtures or potting mixtures with fertilizer added, as complete, lush crops that generate blooms are created by abundant soil.

Moisten the planting medium lightly using a spray bottle.

Plant nasturtium seeds straight in the planting medium. Allow 2 to 3 inches between each seed, and cover the seeds with 1/2 inch to 1 inch of potting soil.

Place the hanging basket in total sunlight. Bright-light encourages healthy development and large, vibrant blooms although nasturtiums tolerate partial shade.

The best 2 to 3″ of soil feels dry to the touch, water the nasturtiums. Add water till it runs through the hole, and allow it to dry between waterings.

See related

Bamboo Harvesting and Growing

Bamboo Harvesting and Growing

You will find several hundred species of bamboo. All are members and crops of the grass family. Bamboo, a flexible landscape plant can rapidly supply a display in a back-drop for the plantings or the fringe of of your house. Bamboo is also cultivated because of its shoots, usually portion of cuisine, as well as for its upright canes that are hollow marked with unique nodes.

Choosing a Selection

Bamboo crops belong to one of two groups, developing both as runner crops or as described clumps that distribute underground stems, or rhizomes, to spread into locations that are new. Even though the type that is running may be invasive, it’s more hardy compared to the clumping kind and appropriate for many areas. It’s possible for you to control the practice by surrounding your planting using a sheet-metal barrier of working bamboo. Bamboo accessible for home gardeners ranges between 3 and 30-feet tall when mature and is ideal for planting in U.S. Department of Agriculture planting zones 5 through 10, depending on the range.

Growing Bamboo

Select both rhizome sections or little bamboo plants to begin your bamboo planting. Choose an area in partial shade or full sunlight and loosen the soil, but prevent including fertilizer to protect the roots. Place crops in the soil level as these were were in their pot that is unique and rhizomes one to two inches. Water and mulch the region. Bamboo does best when soil is permitted to dry somewhat between watering. Watch leaves up that roll, a signal that water is needed by the plants. Once plants are established, fertilize them using a well-balanced fertilizer – to to 6-week intervals.

Bamboo Canes

When a development cycle is started by bamboo, upright shoots appear over the soil and increase extremely quickly to to make canes, branching only if they near their optimum peak. Leaves create near the tops of the crops, along small branches. Bamboo retailers nutritional elements in its rhizomes, and new buds seem on the rhizomes and in the course of time arise from your soil to become canes as the plant grows.

Harvesting

Bamboo offers equally shoots for use as canes and foods that have several ornamental or utilitarian uses. Harvest bamboo shoots in the spring when the crops first start to grow, picking these that are about 6″ large and reducing them a-T groundlevel using a knife. Take only several shoots from a planting to make sure the crops that are adult will carry on to develop and broaden. To poles or harvest canes, select the ones that are three to five years aged. Use a pruning observed to minimize them a-T groundlevel throughout cold temperatures when bugs are inactive. Allow the poles to dry in a guarded location for many weeks before utilizing them.

See related